Astrophotography with the SIGMA fp (2) – 6 Months into my astrophotography journey, I thought it would be good to take stock of lessons learned and the “state-of-play”. It’s been a great journey so far, with results with which I am really pleased. So, as I bring this first chapter to a close – I would like to detail some of the many aspects involved.
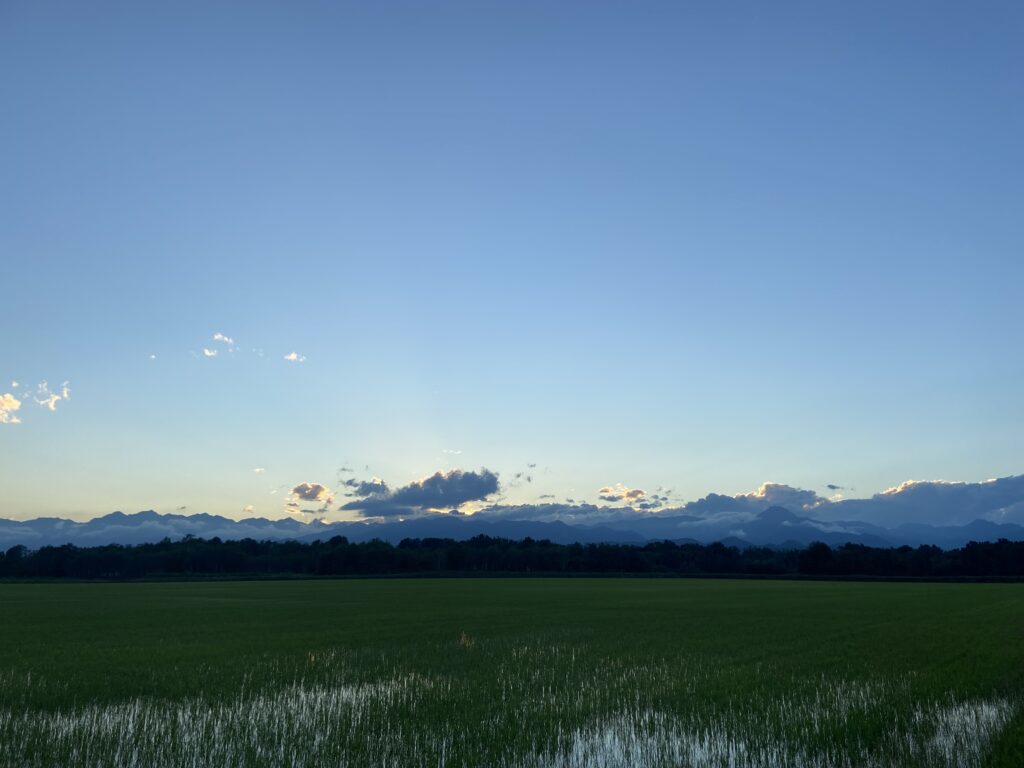
Locations: I made a very conscious decision at the beginning that I would always travel, every single full moon to ensure that I would have (as far that it is possible) somewhere in northwest Europe a clear sky when there would be a new moon. Ideally, this would also be in a “dark-sky” or at least considerably darker sky than where I live in Germany. I have used to Apps to guide me here “Windy” and “Light Pollution Map”. Windy is a phenomenal and, in my experience, an extremely accurate weather app, which allows me to track the development of weather systems across the whole of Europe. The light pollution map allows me to pinpoint locations which then have the darker skies. The combination has meant that I have always been able to find a location, though naturally the weather has meant that this is not always under the darkest sky. The final help comes from “Street View” within Google Earth. I am still amazed (as a pre-internet child) that I can accurately scout a location somewhere in the mountains in northwest Italy or northern Spain (so far 1800 km from where I live has been the remotest location) and identify, in advance, the exact spot where I should be able to set up my telescope and then to be able to drive to exactly this spot. Of course, it is not always so easy, and the vagaries of an unstable weather system have meant that plans have needed to change at short notice and sometimes, what seems like a good location can hold hidden challenges – The rice fields in the province of Vercelli, Italy in May seemed like an excellent “fall-back” location, not particularly dark but a good expansive view. However, the dark clouds rising from the waters at sunset and the accompanying audible hum, declared the error in this thinking – I have never seen so many mosquitos – I don’t know whether it is possible overdose on Autan, the anti-bite spray that by pure chance I had buried in the boot of the car. If you can, I did! It worked, I didn’t get bitten once, but I never expected that perhaps I would have problems shouting an object because of the mass of insects that could be in front of the glass.
Other challenges, in the fields in middle of France in April for example, have included “Steven-King-like” episodes of fog: Here, half-seen “Wraiths” rising from the ground gave warning of the impending end to the photography. A look behind and the approaching wall of fog appears. At such times one thinks of the classic horror movies where some minor character (who you know some 10 minutes later into the film will die horribly) says something like “Don’t worry, it’s just a bit of fog …”, and then, the contrast begins to disappear from each subsequent exposure and you begin wiping the water off the computer screen, and you begin listening very intensively to every noise … Such events are however soon forgotten, as one stands in some remote range of hills and the beauty of the night sky appears, like an old friend, in all its majesty, out of the evening sky above and around you – and I am simply at awe
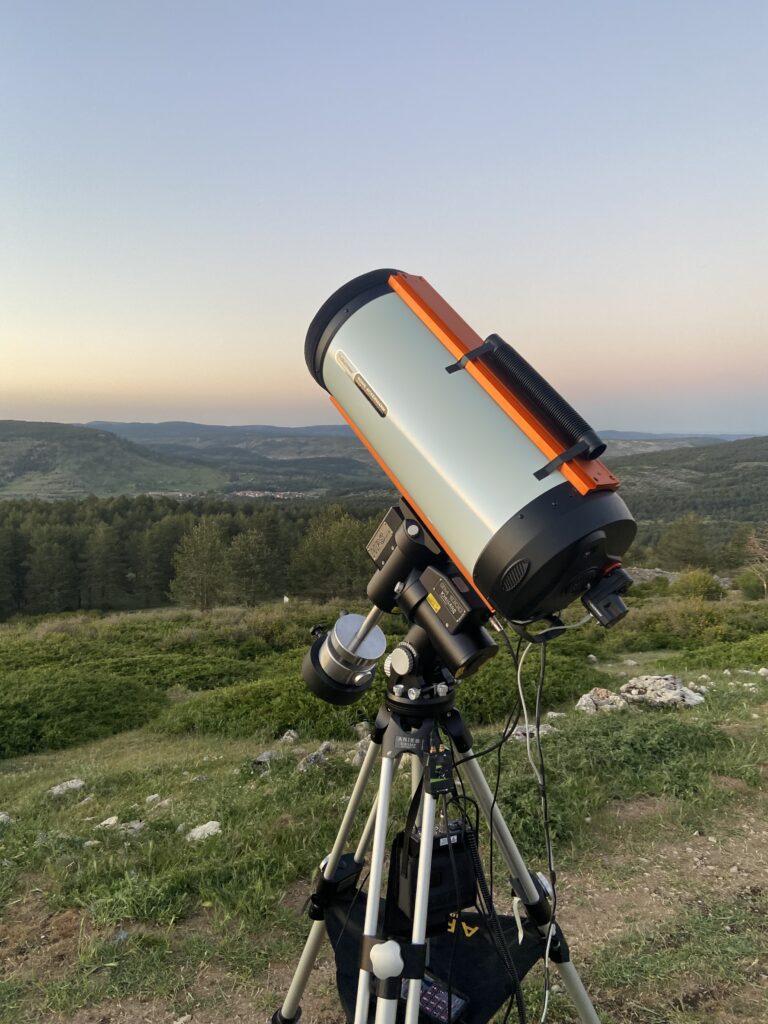
Working with the telescope: The downside of working “on-the road” is that every single night the telescope and camera must be set-up from scratch and in the pre-dawn light dismantled again. Although both are now well-orchestrated events, it does mean that the first 60-90 minutes following the appearance of Polaris (first alignment check) are required to build the model for the sky that the tracker requires. With the long nights of February and March, this was not so noticeable, but when the astronomical night only last 4 hours (or less) in total then this adds a significant pressure to get everything right first time. Another reason to ”head south” in May and June, is that going from 50° to 40° latitude brings a good 60 or so minutes more “night”. The tracker model is (has to be) extremely accurate and even though the tripod is set up on kitchen tiles to spread the weight, on occasion the ground has proved to be less stable than anticipated with the very slight movements due to weight (ca. 50+ kg in total) being enough to ruin a night’s photography …
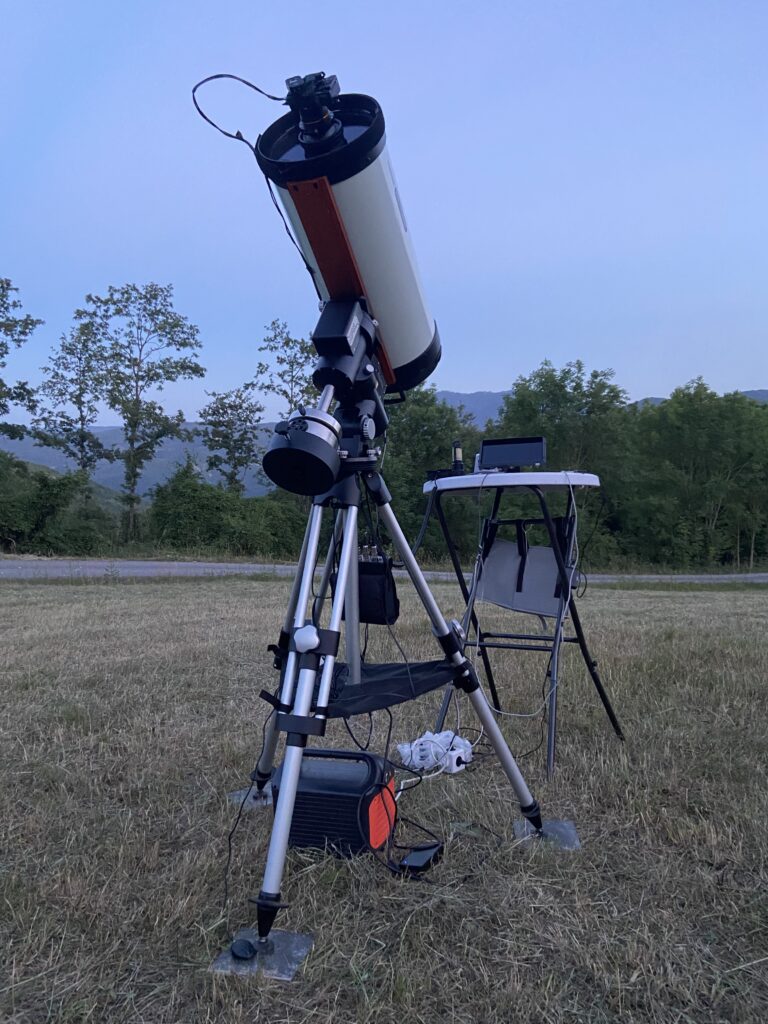
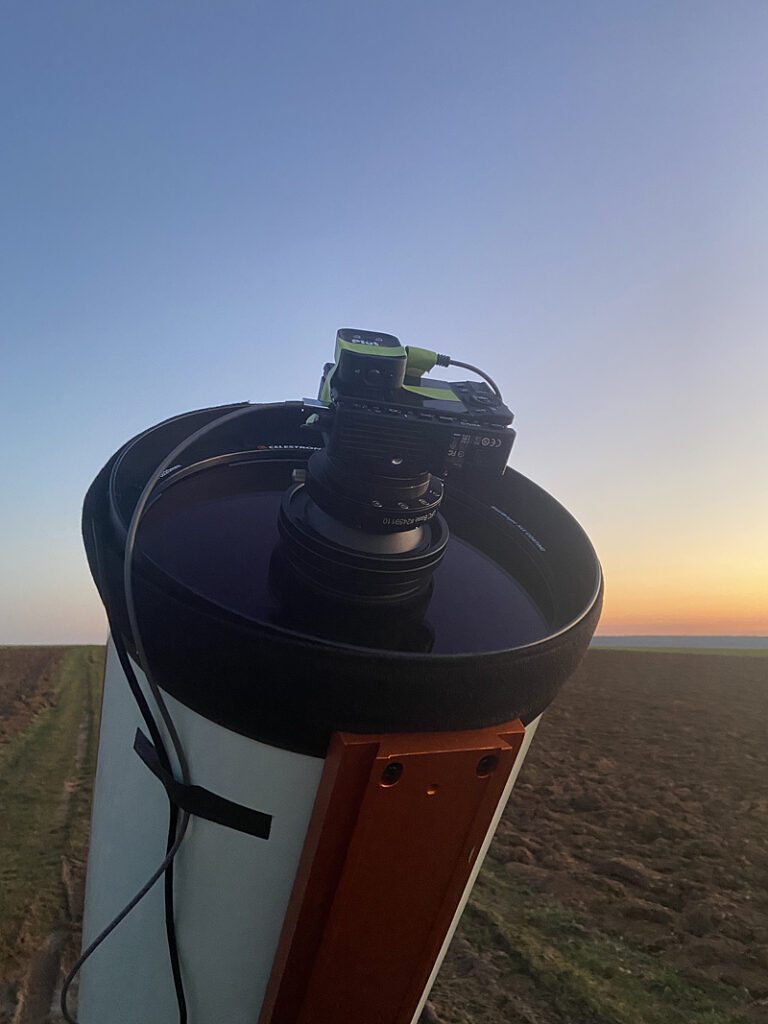
However, the most difficult task by far has been to focus the scope and I have progressed through many ways to achieve this. I really did not anticipate, although I knew in advance that a F2.2 Scope, such as the Celestron RASA 11”, is difficult to focus, indeed just how much work this would be. With over 40.000 single steps available to the focus motor (way more than could be achieved by hand), I did not anticipate that I would be able to see the difference in the fine structure of a nebula (when viewing conditions are good) between a single step of the focus motor, i.e. that say position 35.678 would be better than position 35.679 for example. Because light at different wavelengths has a different focus point (the basic physical property behind chromatic aberration in a terrestrial photographic lens), each narrowband filter has a different focus setting.
It is an “interesting” experience to be hunting for the final focus position for a new filter, when you are aware that only 45 minutes remains before the first signs of the pre-dawn light will appear … 😉 A good check has been to not focus on the potentially faint target at hand, but rather to pre-focus with the brightest nebulosity available (perhaps Orion in winter / Eagle in Summer) before moving to the desired target. It is a good that I enjoy a challenge. 😊
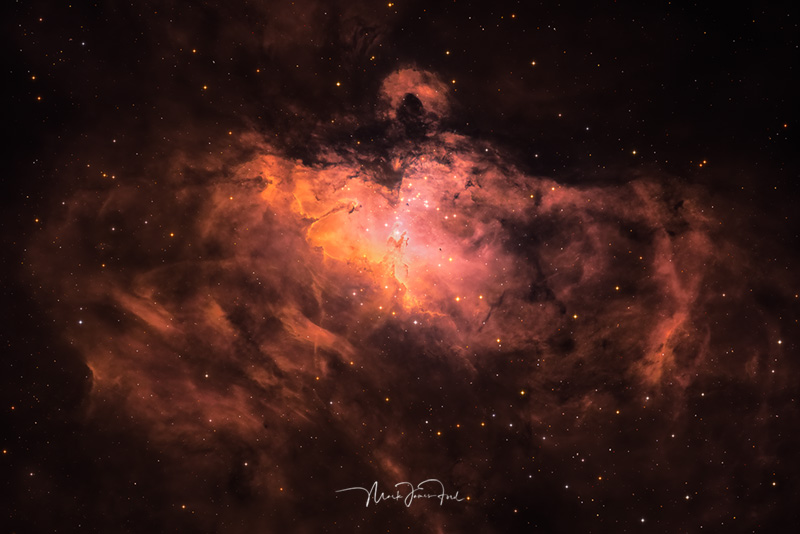
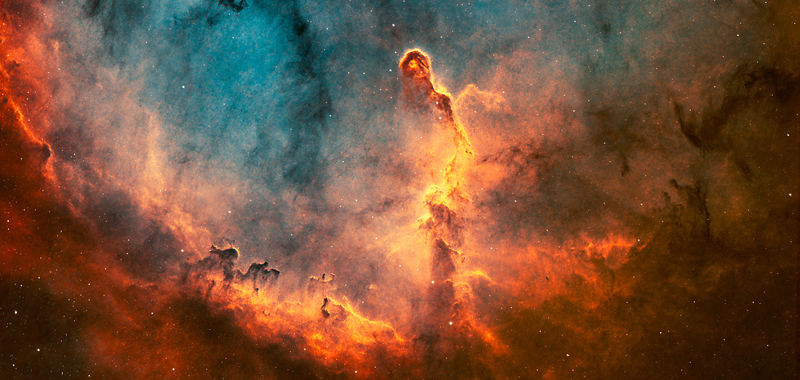
Post processing: I always intended that I would work somewhat “unconventionally” with the data I would collect. Here, I really wanted to build on very many years of experience with post production of digital images. I am very pleased, that I have really been able to validate the assumptions I made as to why and how this should be possible. Of course, the first fundamental building block is that the camera has to deliver good data. Here, I have not been disappointed. The heatsink built into the camera to enable many hours of video shooting is just as effective with repeated long (5 minute) exposures during my astrophotography. I need to collect 3 types of data: “Flats”, “Dark” frames and the “Lights” (the nebula data itself). The Flats I take about 1-2 hours before sunset (if there is no cloud) at around 60° inclination and in the opposite direction to the sun. This should be a uniformly exposed image, from which I will be able to correct vignetting in the “Lights” and be able to identify where any sensor spots may be present. The “Dark” frames, taken at the end of the evening by simply blocking the light entering the camera are used to generate a “Bad Pixel Map” and to identify any residual sensor noise not directly related to an image. All these modifications are made to the individual “Lights”, which are processed (calibrated, registered, and integrated together) in Astro Pixel Processor (Mac only). The image data from each individual filter are then further processsed in Adobe Photoshop, where they are assigned to a colour channel or channels and these various colour channels are then blended to give a final (false colour) image. The choice of colour palette can have a dramatic effect on the final image and considerable creativity can be brought to play. By suitable choice of the colour channel(s) considerable detail can be made visible that would otherwise be lost.
It has been a wonderful journey so far and the idea of spending the next few nights under the clear skies of the next full moon somewhere in the middle of nowhere is as exciting as ever …
Clear Skies, Mark